The main question I get when someone sees my pants for the first time is, "How did you make those?!?" I thought I would answer the question here. Now mind you, some of my methods are pretty old school and I'm self taught so all you professional graphic designers please don't make fun of me :) Here goes!
The company I use to make my pants is called Printful Inc. They have a very user friendly website, and a mock up generator so I can see how my design is going to look ahead of time.

So my first step is to make the design I want on my pants. For my yoga pants specifically I have designed a template on (here is where I get old school) Windows Paint program. It works, it is very easy to use and there is no extra fee to use it. This is my template below, then I fill in the white part with my preferred image.
To find an image I go to a couple different websites:
1. Shutterstock.com - With Shutterstock you can purchase a license to use their stock photos on your commercial goods.
2. Pixabay.com - This site offers free stock photos for your commercial use. I believe you can donate to the artist if you would like.
Even though I love taking pictures, I decided to use stock photos for my designs because I can find images with a high pixel number, making the overall quality of the print on my pants more clear. The less pixels, the more blurry the image will be. Also, many of the places I want to feature on my my pants I haven't been too....yet.
For this tutorial, I'm going to use this photo I purchased from Shutterstock of the Santa Monica Pier. 100% of the profits from my pants go to organizations that help the homeless community in the region that are on the pant's design. Since this design will have a ferris wheel on it, I thought it would be neat to find an organization to donate to in Southern California that help homeless youth get off the street. The organization I found is called, "School on Wheels Inc". The help homeless children get an education, and provide fun and safe learning environments. To learn more about this awesome organization click here.

Now That I have my finished design, I have to pull up the mock-up generator from Printful. This design is just one leg of the pants, so I will up load it twice and add it to both sides. I also, reverse the image for the opposite leg so it has a more fluid design on the pants instead of have the image just cut off. When I'm finished I'll click 'Generate File to get a preview of what the pants will look like.


Here is the finished look. Note: When planning out your design, keep in mind your design is going on a curved body and could distort the image. The preview does help give a good idea of what it will look like on the body.


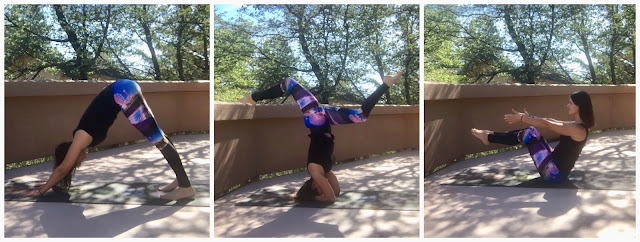
I loved how the design looked in the mock up photos, so I ordered a pair to see what they looked like in real life. Printful takes my design and uses a technique called sublimation printing to get my design onto the material. The material is hand cut and sewn in California, then sent to me. After all that, here they are!

I am an affiliate with Printful and Shutterstock so if you decide to make your own yoga pants, and have any questions I'll be happy to help. Click here to visit my contact page to email me.
Happy Designing,
Holly
Comments
Post a Comment